

When you use CamillaDSP configuration files from an older version, or update CamillaDSP to a new major version, you may need to update your configuration files to make them compatible with the current version. For the upcoming CamillaDSP 5.x, this is also the case.
CamillaDSP itself does not support updating configuration files, but luckily, CamillaGUI does.
This article explains how to update your configuration files to the current CamillaDSP version. The article is written from the point of view of a moOde audio player user, but is also usable when only CamillaGUI is used.
Invalid CamillaDSP config files in moOde
When a CamillaDSP configuration file is invalid, you may see a message indicating that the output device could not be opened.
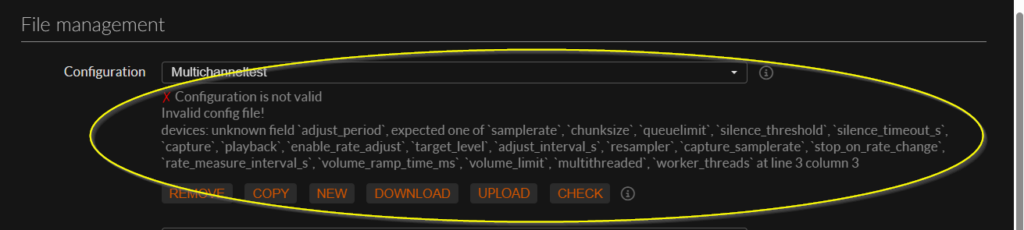
You can check whether a configuration is valid in moOde by selecting the configuration in the File Management section. If the configuration is invalid, a red cross is shown along with the reason for the error
Open CamillaGUI in moOde
If working with moOde (skip if your are directly working with CamillaGUI):
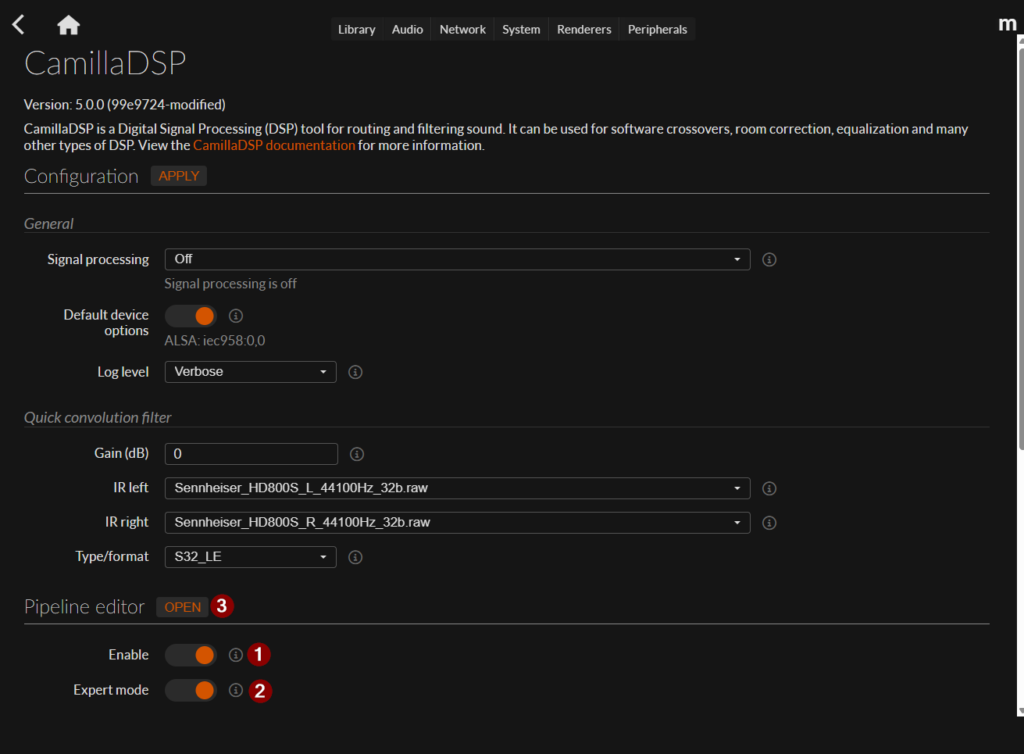
- Open the CamillaDSP page in moOde.
- If not already start the CamillaGUI (in moOde called the pipeline editor):
- Press Enable
- Press Expert Mode (if present)
- Press open
Updating CamillaDSP configuration files
Updating a configuration is done by importing the configuration file and saving it again. During the import, outdated constructs are replaced.
- In CammilaGUI select the Files tab .
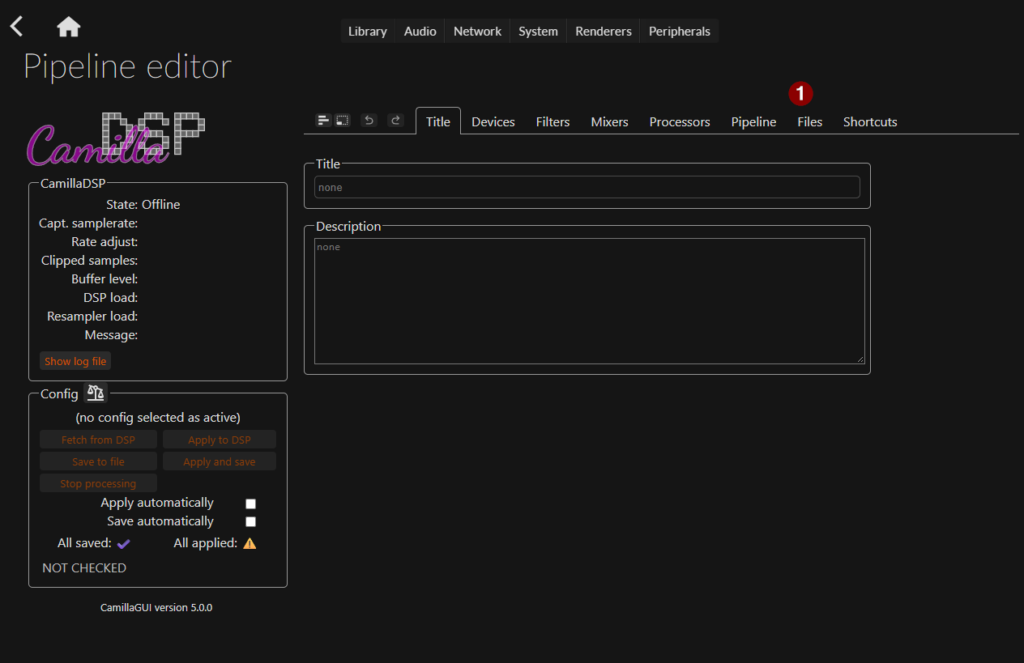
When you have “bad” configuration files, you will notice that the Valid column contains a red cross for each invalid configuration file.
Before importing, you need to create a clean, new configuration, because the import is actually a merge. This is very convenient when you want to copy filters and mixers from other configuration files.
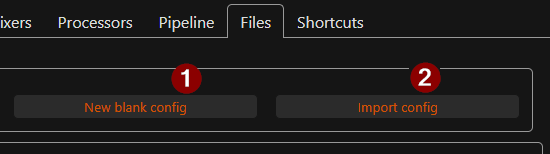
- Press “New blank config” button above the file list.
Next is import the invalid config file:
- Press the “Import config” button above the file list.
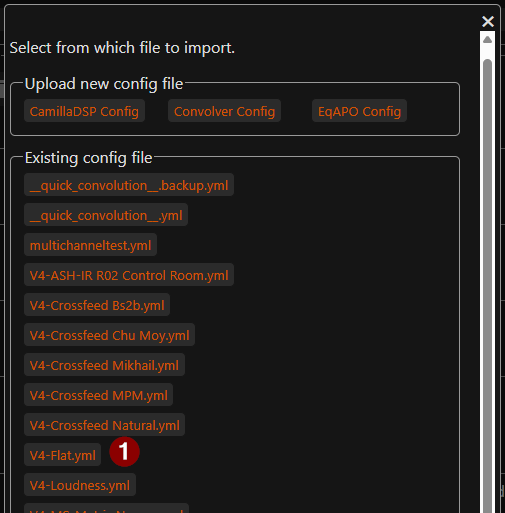
You can supply an external file (with upload new config file) or select an Existing config file.
- Select the file config you want to update.
Next is to select what you want to import.
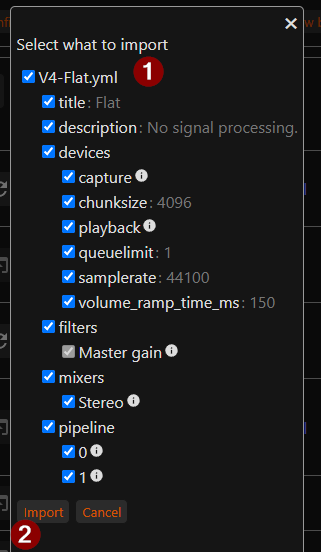
- Select top one, this will select everything else.
- Followed by the Import button
It will confirm that the import is
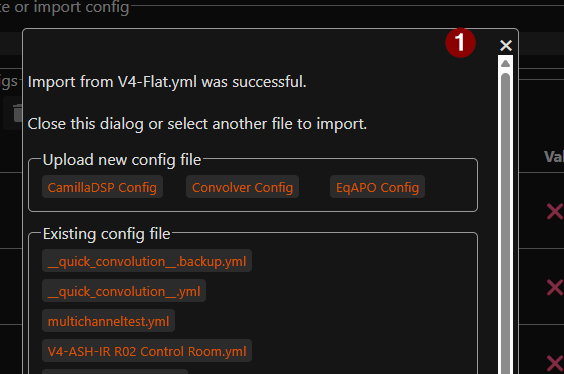
- Close the import dialog with the X in the the upper right corner.
During the import, old configuration constructs are migrated to the current version. Finally, save the updated configuration file.
We have two choices.
Save over an existing configuration file:
- At the file list press the save icon at the left side of configuration file name.
Or save as a new file:
- At the bottom of the file list enter a new name and press the save icon.

In both cases, the Valid column should now show a check mark instead of a red cross.

Now you can use your configuration again.