
This article describes how you can achieve multichannel output with moOde and CamillaDSP. Most setups will only require stereo output, but what if you need more? Luckily this is supported out of the box with Moode.
For this first you need a device capable of handling multiple channel output. With moOde this is limited HDMI or USB interfaces. The Raspberry Pi I2S bus used for audio HATs is only implemented for 2 channels. For the USB audio interface it also applies that the device must be supported by the used Linux kernel (5.15.28 with moOde 8.0.2).
What will we do?
We will setup a very basic 4 channel output pipeline. The stereo source is split from 2 to 4 channels. Of course you own pipeline will more useful, but this is enough to demonstrate how to setup the multichannel aspect with moOde.

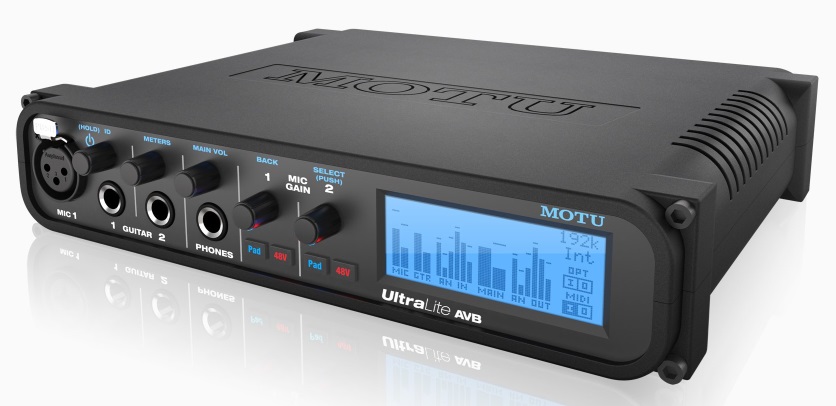
In this article a MOTU ultralite AVB is used. It present it self as 24 channel output device.
Setup correct device
First we need to select a valid audio device for moOde.
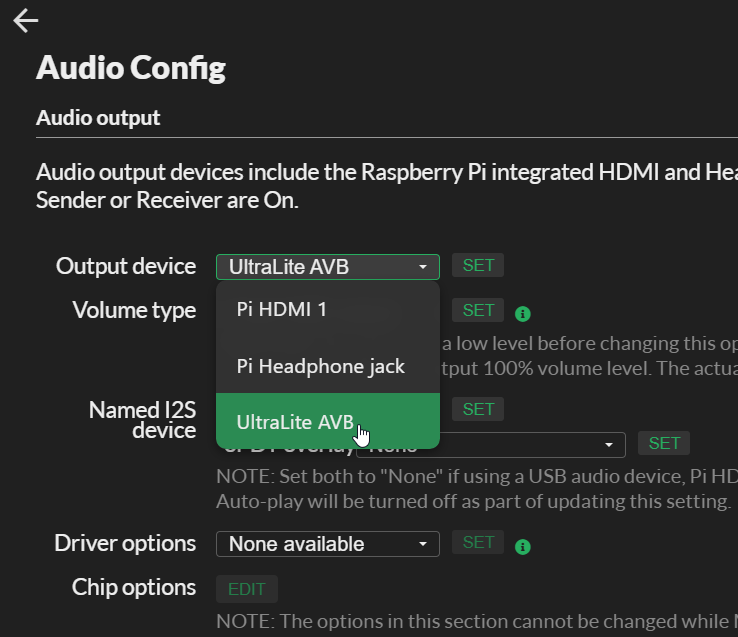
- Open the moOde audio config page
- Select the correct device from the dropdown list
- Press set
Prepare moOde for CamillaDSP

Copy an empty config as test pipeline:
- Open the moOde CamillaDSP configuration page
- Select flat from from the dropdown list in the ‘Pipeline configuration’ section
- Press copy
- When asked for a name any name is good. In the example we use
flat-mc.
Next activate that configuration:
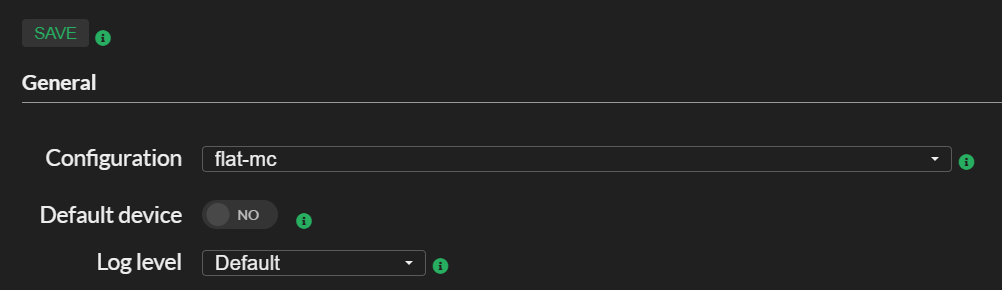
- Select
flat-mcfrom from the dropdown list in the General configuration section - Make sure the default device button it toggled to ON (the default)
- Press save
Now a nice default configuration for two channels is created and activated for stereo use. Normally moOde modifies the CamillaDSP config values for playback device, audio format and channels.
This time we want to prevent that, because we want to set the number of channels ourselves:
- Make sure the default device button it toggled to OFF (the default)
- Press save
We didn’t disabled it the first time, to make sure the initial config settings are used.
Next: enable the CamillaDSP configuration editor
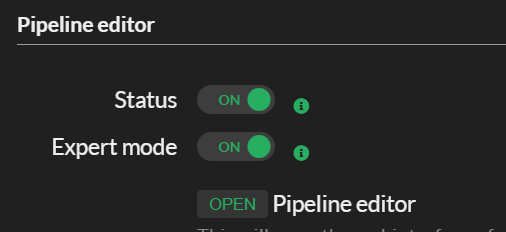
- Toggle the status of the editor to ON
- Also toggle the expert mode to ON to make some additional settings visible required for multichannel output.
Change the CamillaDSP configuration for multichannel output
When the CamillaDSP pipeline editor is opened, scroll to the section ‘Playback device’ at bottom. The four available fields are already filled in.
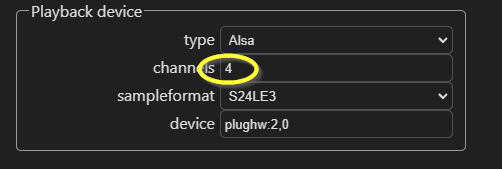
While in this example the device supports 24 outputs, but only 4 channels are set. You should enter the highest channel number of your device that will be used.
If I would have entered 24 channels CamillaDSP would output 24 streams, which wast unnecessary resource like CPU and memory. By using the device with alsa plug (plughw prefix instead of hw), the plug will make a channels conversion for you.
The MOTU AVB devices support mapping of computer channels vs output, which makes it easy to arrange the channels is logical order.
For this device we are gonna use the first 4 channels only, but lets say you want to use channels 5-8, then you should enter 8.
- Enter the highest number of the channel you need.
The moment you changed the number of channels, on top the pipeline tab show a red mark that the pipeline contains errors.
To correct this we need to change the settings of the mixer.
- Click on the mixer tab
- On top set the ‘out’ setting from 2 to 4
- press twice the second bottom plus
- Set the destination and source channel correct and if you want provide a gain (keep in mind the channels are numbered starting from 0 and not 1!).
The mixer settings should look like:
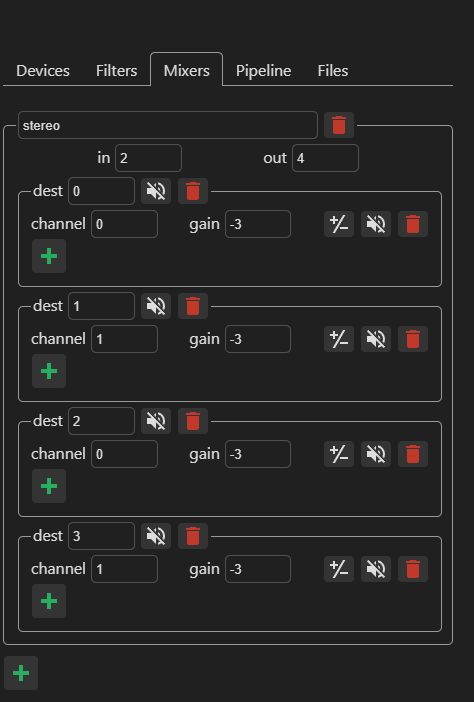
You can now press ‘Apply to DSP’ in left sidebar to activate and save the configuration.
The mixer only need settings for the channels you use. For example if you want to use the 1,2,5 and 6 channels, then you have set the used number of channels to 6. The mixer setting would then look like:
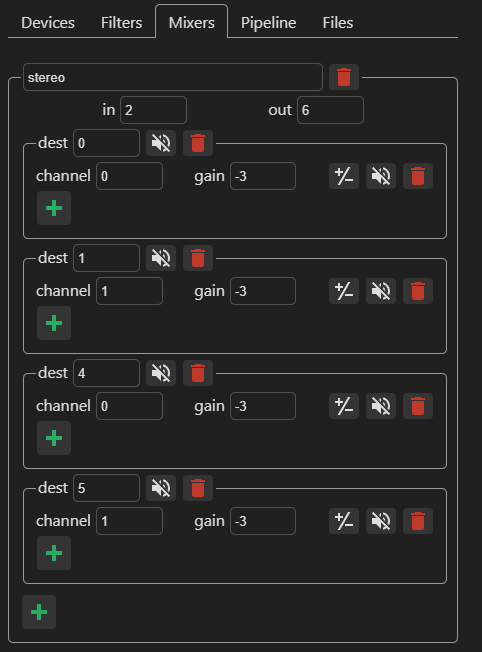
And the matching pipeline configuration would look like:
Listen to the result
- To go back to the player interface ; press on top op the webpage two times the back arrow
- Select some music or radio station to play
- Now the stereo source is send to 4 output channels
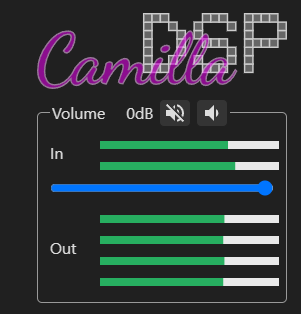
Without speaker/headphones connected you can also see the output in the CamillaDSP editor.
- Go back to the CamillaDSP pipeline editor
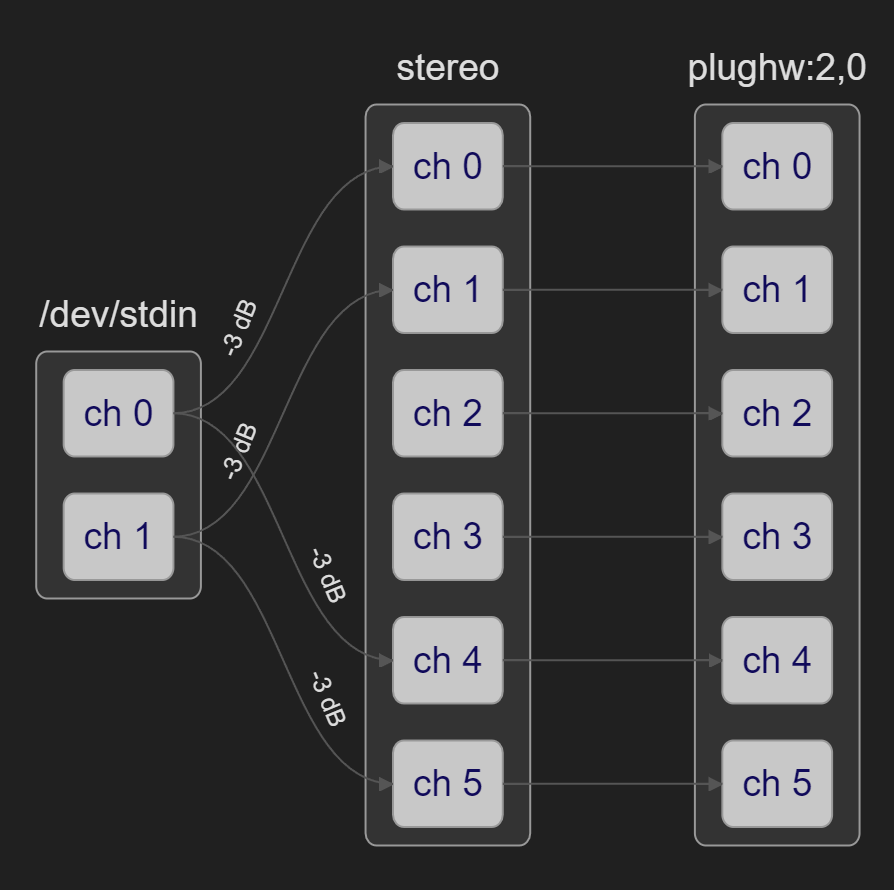
- In the upper left corner you can see the meters moving for the input and output:
Now we have everything in place, it is time to make you own pipeline like a nice active cross-over.
Thanks for reading.