moOde supports various audio sources. The most common used sources are (network) files and streaming (UPnP/Airplay/Bluetooth). Also alternative renders like Roon and LMS are available. But what if you want to capture external source like SPDIF or analog?
Maybe you just want to select you source digital, or stream it over the air or you just want to apply CamillaDSP to everything you play. Currently this isn’t supported out of the box with moOde. Luckily it can be accomplished with very small effort.
What will we do?
Sorry but this is going to be a long read:
- First we will collect some info about the available audio inputs.
- Next make a configuration which make dealing with the inputs easier.
- The main dish; how to use the inputs in a little bit fancier way with MPD/moOde.
- And for the hardcore audience; as dessert followed by an how to use the inputs with CamillaDSP directly.
None of the activities involves programming or changing code of moOde. Just changing setting and creating/update some configuration files.
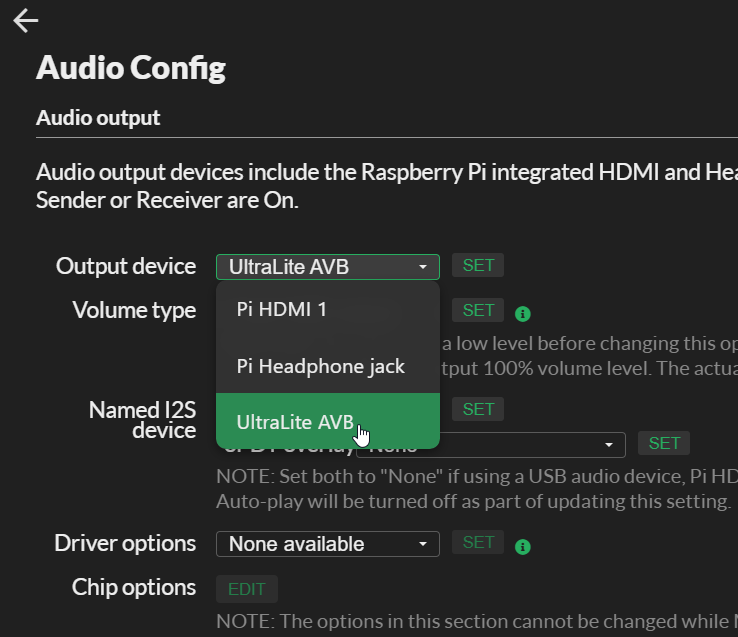
Because we concentrate on the inputs this time, I assume that you already have setup a working audio output on your Pi with moOde. (At the moment of writing moOde 8.0.2 is used). And checked that CamillaDSP flat config works fine.
The used device
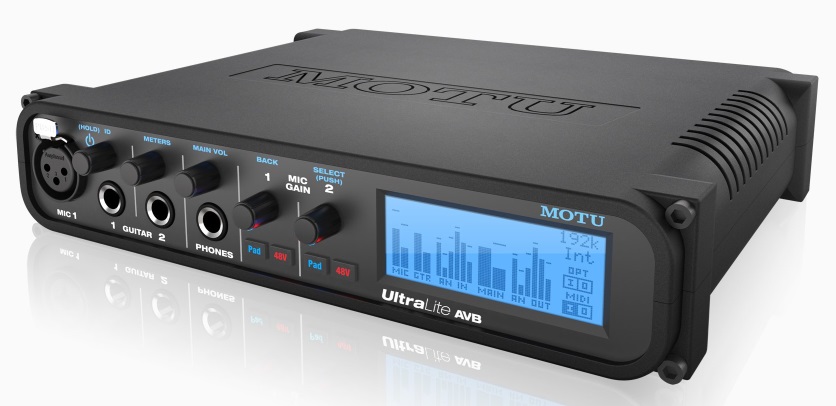
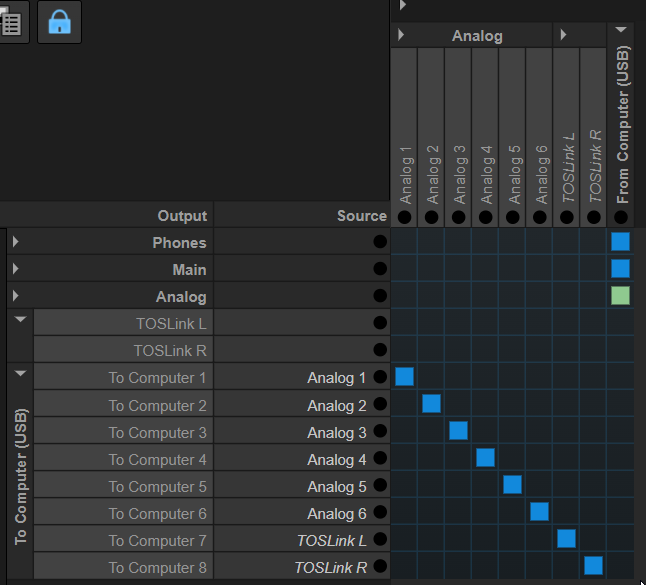
As example device we will use a MOTO AVB device, with the following input mapping:
- analog 1 input (device channels 0,1)
- analog 2 input (device channels 2,3)
- analog 3 input (device channels 4,5)
- toslink (device channels 6,7)
This mapping will differ per used device, with most MOTU devices you can setup a mapping in the settings of the device:
Disclaimer: I’m using this device because this is what I have at hand. It’s a fantastic device for what I normally use it for. But in the context of this blog, inputs, it (or the drivers) has some quirks. The UAC compatibility is not straight forward. And yes I also tried the Drumfix drivers from github. If you’re interested I have a prebuilt debian package for moOde available.
Device details
Before we start configuring the system, we need some details about the device. The same tools can also come in handy when solving problems.
List available usb devices
pi@moode:~ $ lsusb -tv
/:  Bus 02.Port 1: Dev 1, Class=root_hub, Driver=xhci_hcd/4p, 5000M
    ID 1d6b:0003 Linux Foundation 3.0 root hub
/:  Bus 01.Port 1: Dev 1, Class=root_hub, Driver=xhci_hcd/1p, 480M
    ID 1d6b:0002 Linux Foundation 2.0 root hub
    |__ Port 1: Dev 2, If 0, Class=Hub, Driver=hub/4p, 480M
        ID 2109:3431 VIA Labs, Inc. Hub
        |__ Port 1: Dev 3, If 0, Class=Audio, Driver=snd-usb-audio, 480M
            ID 07fd:0005 Mark of the Unicorn
        |__ Port 1: Dev 3, If 1, Class=Audio, Driver=snd-usb-audio, 480M
            ID 07fd:0005 Mark of the Unicorn
        |__ Port 1: Dev 3, If 2, Class=Audio, Driver=snd-usb-audio, 480M
            ID 07fd:0005 Mark of the Unicorn
        |__ Port 1: Dev 3, If 3, Class=Audio, Driver=snd-usb-audio, 480M
            ID 07fd:0005 Mark of the Unicorn
        |__ Port 1: Dev 3, If 4, Class=Audio, Driver=snd-usb-audio, 480M
            ID 07fd:0005 Mark of the Unicorn
        |__ Port 1: Dev 3, If 5, Class=Vendor Specific Class, Driver=, 480M
            ID 07fd:0005 Mark of the Unicorn
        |__ Port 1: Dev 3, If 6, Class=Vendor Specific Class, Driver=, 480M
            ID 07fd:0005 Mark of the Unicorn
        |__ Port 1: Dev 3, If 7, Class=Vendor Specific Class, Driver=, 480M
            ID 07fd:0005 Mark of the Unicorn
Notice the Class=audio with the Driver=snd-usb-audio (or motu when using the drumfix drivers); that is a UAC comptabile interface.
List the available capture devices
Lets see which capture devices are available with Alsa:
pi@moode:~ $ arecord -l
**** List of CAPTURE Hardware Devices ****
card 2: AVB [UltraLite AVB], device 0: USB Audio [USB Audio]
  Subdevices: 1/1
  Subdevice #0: subdevice #0
From this output we learned that the capture device has card number 2.
Get details of the capture device
Now we know the card number we can dive deeper for more details:
pi@moode:~ $ arecord -D hw:2,0,0 --dump-hw-params
Recording WAVE 'stdin' : Unsigned 8 bit, Rate 8000 Hz, Mono
HW Params of device "hw:2,0,0":
--------------------
ACCESS:  MMAP_INTERLEAVED RW_INTERLEAVED
FORMAT:  S24_3LE
SUBFORMAT:  STD
SAMPLE_BITS: 24
FRAME_BITS: 576
CHANNELS: 24
RATE: [44100 192000]
PERIOD_TIME: [125 165103)
PERIOD_SIZE: [6 7281]
PERIOD_BYTES: [432 524232]
PERIODS: [2 1024]
BUFFER_TIME: (62 330227)
BUFFER_SIZE: [12 14563]
BUFFER_BYTES: [864 1048536]
TICK_TIME: ALL
--------------------
This time we learned:
- The sample format of the device is S24_3LE.
- It haves 24 input channels available.
- Is supports a sample rate from 44.1kHz till 192kHz.
Splitting the inputs
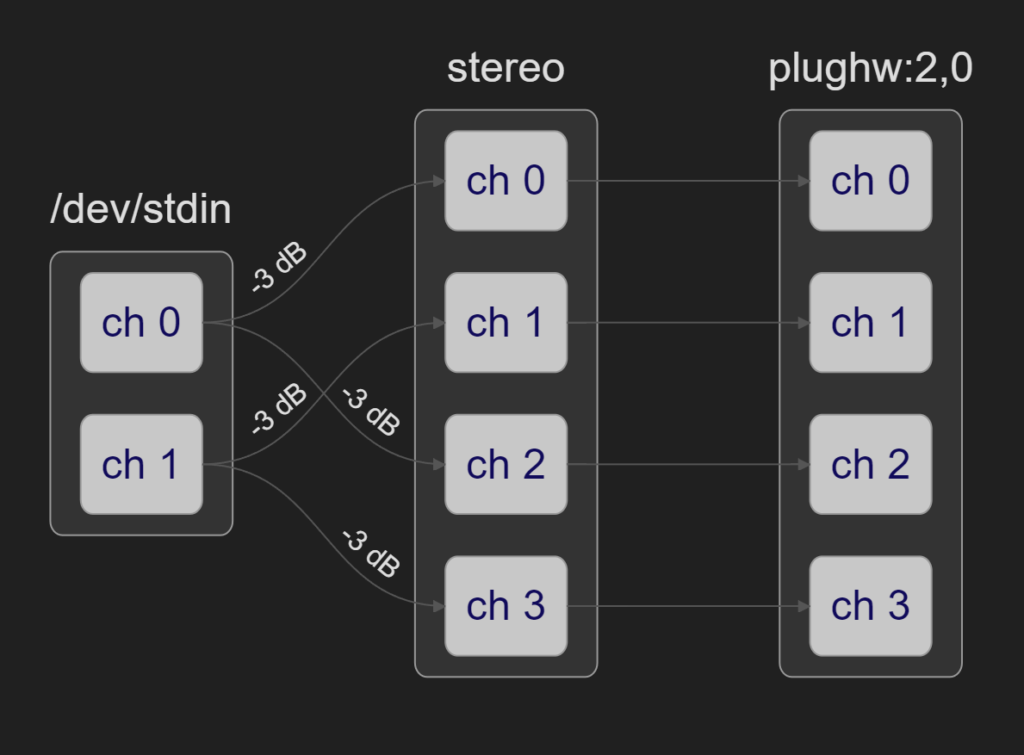
To make it easier to select the correct input, you can split up the input. Nice background article about how to do that is Audio multi-channel routing and mixing using alsalib.
For this we will create a file /etc/alsa/conf.d/motu_avb_inputs.conf, with the content below.
The name of the file can be anything, as long as it is put in the correct location.
pcm_slave.motu {
        pcm "hw:2,0,0"
        rate 44100
        channels 24
}

pcm.ainput1 {
        type dsnoop
        ipc_key 12378
        slave motu
        bindings.0 0
        bindings.1 1
}

pcm.ainput2 {
        type dsnoop
        ipc_key 12378
        slave motu
        bindings.0 2
        bindings.1 3
}

pcm.ainput3 {
        type dsnoop
        ipc_key 12378
        slave motu
        bindings.0 4
        bindings.1 5
}


pcm.toslink {
        type dsnoop
        ipc_key 12378
        slave motu
        bindings.0 6
        bindings.1 7
}
If you copied the new configuration file to the correct location, you can check the availabity of the new named input devices
pi@moode:~ $ arecord -L
...
ainput1
ainput2
ainput3
toslink
...
Next you can optional test if you can record from a specific input:
pi@moode:~ $ sudo arecord -D ainput1 -f S24_3LE -r 44100 -c 2 test.wav
(ctr+c will abort the recording)
And if you want to play it back (of course use your own device here):
aplay -D plughw:2,0 test.wav
If you came this far for own device, you will have now a working input(s). Next is to simultaneous capture and play it back.
Using inputs with MPD and the moOde user interface
In this mode the audio input is captured by MPD before handing over to CamillaDSP or audio device.
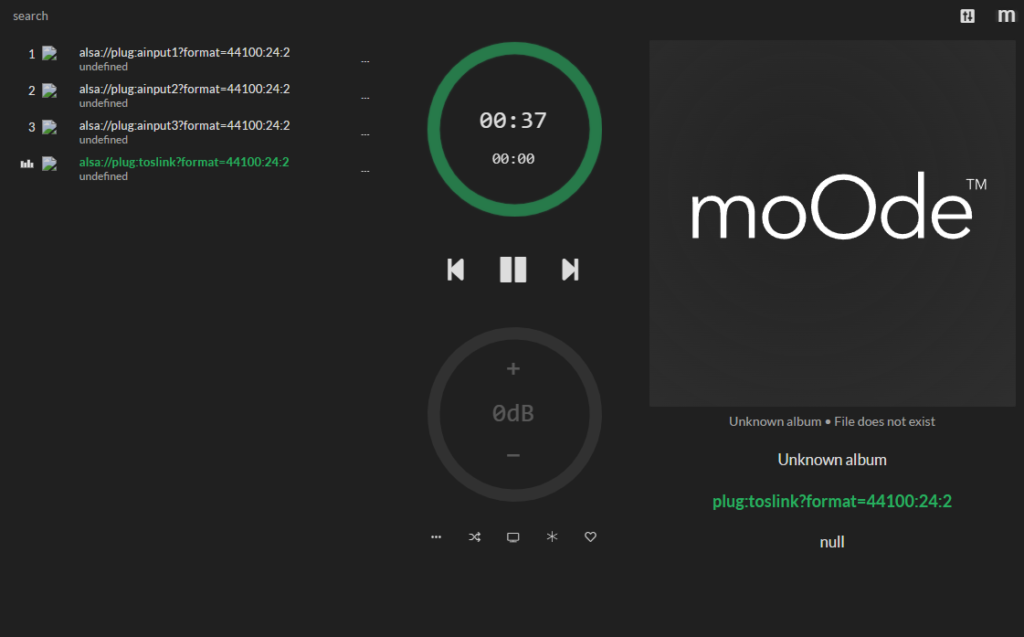
This is as simple as creating a playlist with the inputs mapping of above :
#ETM3U

#EXTINF:-1, input 1
alsa://plug:ainput1?format=44100:24:2
#EXTINF:-1, input 2
alsa://plug:ainput2?format=44100:24:2
#EXTINF:-1, input 3
alsa://plug:ainput3?format=44100:24:2
#EXTINF:-1, toslink
alsa://plug:toslink?format=44100:24:2
Place this file in the playlist directory of your moOde system:
- By using the network share
\\<moode host name or ip>\Playlists - Or place it directly local on the moode system at the location
/var/lib/mpd/playlists/.
In this case I named it motu.m3u.
Unfortunately the EXT information isn’t shown by MPD. It would nicer if the EXT info name was shown instead of the full alsa plugin config.
If it is possible to use the EXTINF, please let me know.
You can find back the playlist in library view of moOde:
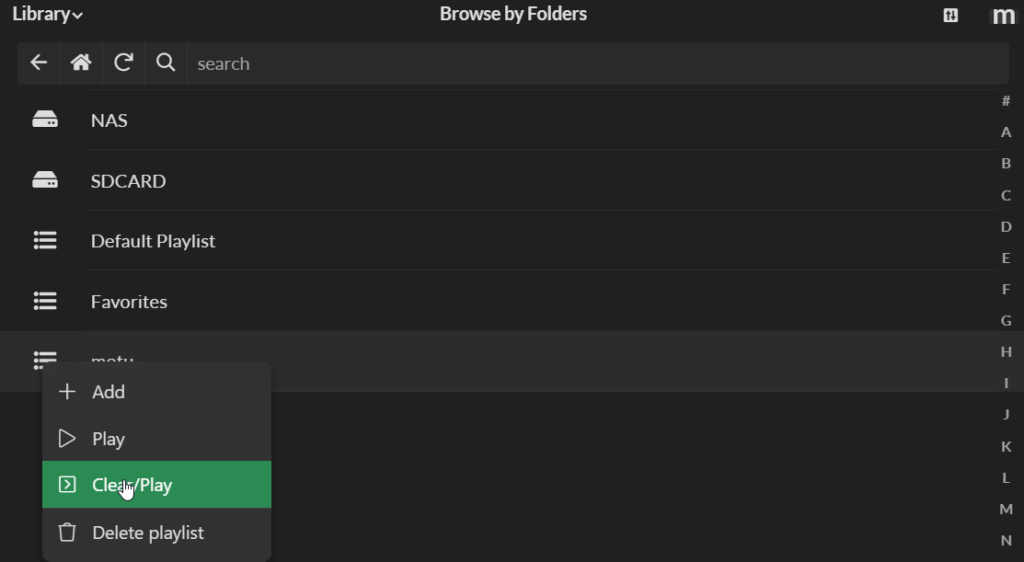
- Press on hamburger menu left from playlist name
- And press Add, Play or Clear/Play
Now the playlist is active of the main screen. You can select a different input by click it on in the current playqueue.
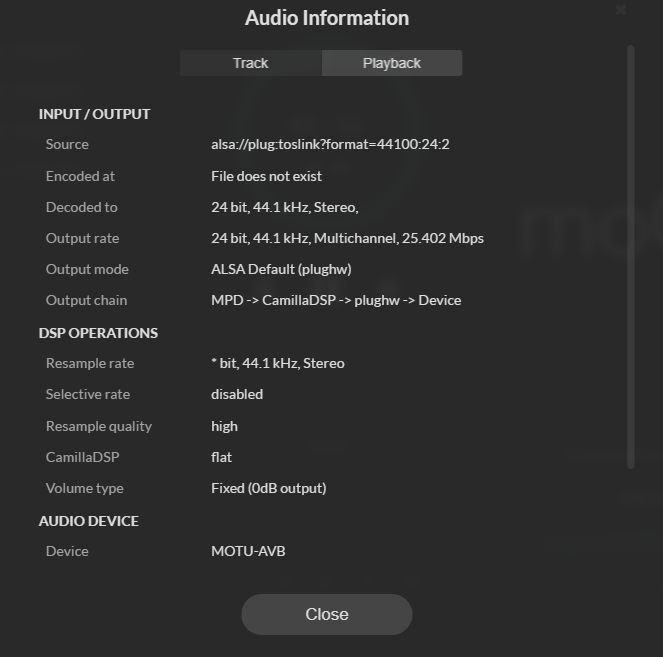
And of course proof that it is playing as expect from the audio information dialog (press the M in the upper right corner and select audio info):
Below is a screenshot with the CPU load of simultaneous capture and playback on a Pi 4:

Despite the fact that the input selection is not fully integrated in moOde, that wasn’t so hard to do. I think we come a long way with the playlist.
Any DSP function like the Peq or CamillaDSP can be applied just like with regular MPD playback.
Using the inputs directly with CamillaDSP
This chapter isn’t needed unless you want to bypass MPD between the capture input and CamillaDSP. But it will be less flexible than the MPD solution.
If you just want to directly use the source with CamillaDSP you can arrange this from the CamillaDSP configuration file.
Only the default configuration of CamillaDSP with moOde doesn’t allow using the inputs from the CamillaDSP configuration file. This is because moOde is using the great alsa_cdsp module from scripple. This module makes automatic rate, format and channel switching possible with CamillaDSP.
But when alsa_cdsp is used alsa_cdsp also is in control of starting and stopping CamillaDSP, which is required when changing rate, format or channels.
To use the inputs directly with CamillaDSP we need to:
- Make sure moOde doesn’t alter the CamillaDSP configuration files any longer.
- CamillaDSP is start standalone (with a service script).
Downside is that as long as CamillaDSP standalone is used the output device, no other device can use the output device directly.
Copy a clean config:
- Select the configuration flat
- Press copy
- Named it cdsp_direct

Make it the active configuration:
- Select if as the active config
- Make sure default device is turned ON
- Press save
- Toggle default device OFF
- Press save again

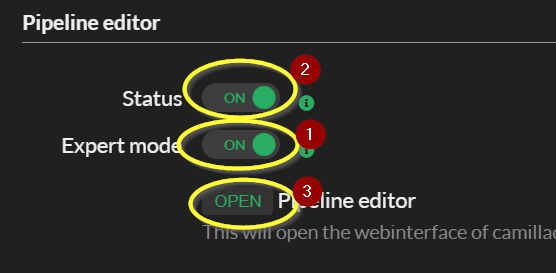
Open the CamillaDSP pipeline editor:
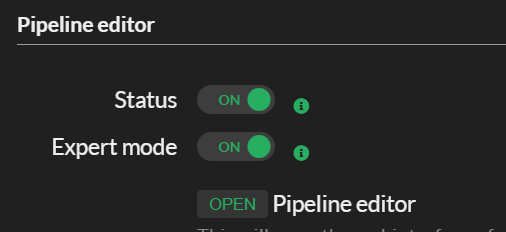
- Toggle Expert mode to ON
- Toggle Status to ON
- Press OPEN
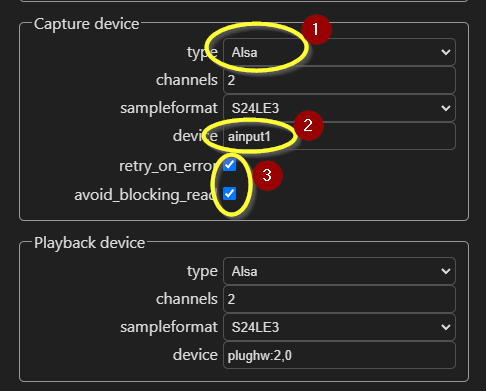
Set the capture device
- Change the capture device to alsa
- Set as device the desired input, in my case ainput1
- Step 3 is optional
Start CamillaDSP standalone
Login to the terminal (with SSH or the onboard webterminal from moOde in system config)
Type in the following commands:
pi@moode:~ $ mpc stop
pi@moode:~ $ wget https://raw.githubusercontent.com/moode-player/pkgbuild/main/packages/camilladsp/camilladsp.service
pi@moode:~ $ sudo mv ./camilladsp.service /lib/systemd/system
pi@moode:~ $ sudo systemctl start camilladsp
pi@moode:~ $ sudo systemctl status camilladsp
If you are happy with the result, after testing, you can the command below to make sure CamillaDSP is started again after a boot:
pi@moode:~ $ sudo systemctl enable camilladsp
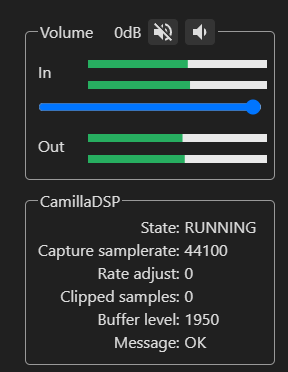
If you play music at input source, you should be able to see it at the volume bar in the pipeline editor:
